GraphicsPath 를 이용하여 둥근 버튼, 별표 등 다양한 형태의 도형을 만들 수 있습니다.
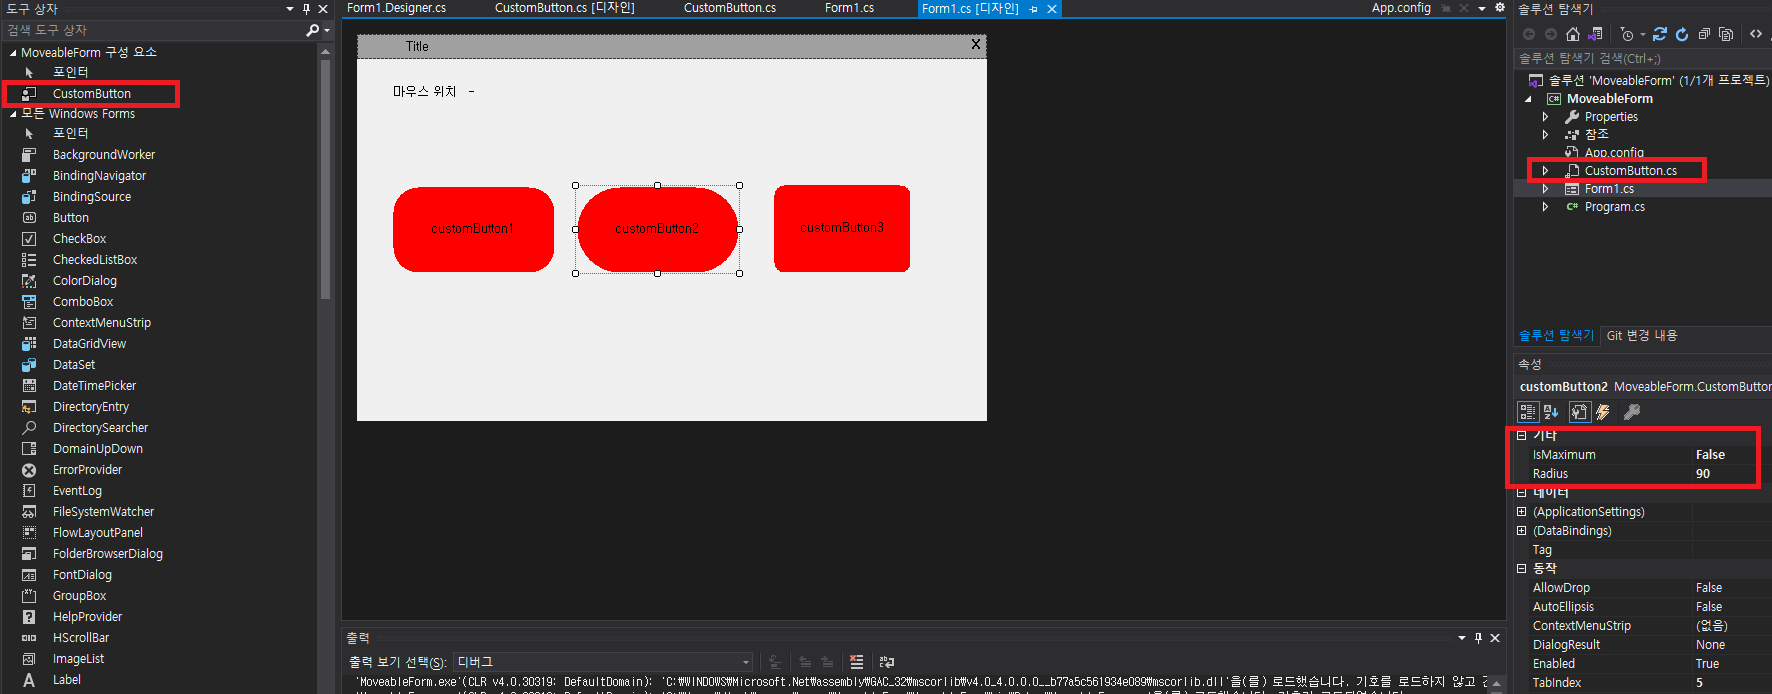
1. 새 항목 추가로 클래스를 만들어줍니다.

2. 아래와 같이 Button을 상속 받고 로직을 작성해줍니다.
(path 첫 위치에 따라 회전각도가 달라집니다. 회전은 0도 = 12시 방향이고, 시계방향으로 돕니다!)
using System;
using System.Drawing;
using System.Drawing.Drawing2D;
using System.Windows.Forms;

namespace MyButton
{
    class CustomButton : Button
    {
        public int Radius { get; set; } //외부에서 크기를 받습니다.
        public bool IsMaximum { get; set; } //외부에서 최대 사이즈를 받습니다.

        public CustomButton ()
        {
            Radius = 20;
            IsMaximum = true;

            this.BackColor = Color.Red; //기본 색을 지정해줍니다.
            this.FlatStyle = FlatStyle.Flat; //버튼을 플랫하게 만들어줍니다.
            this.FlatAppearance.BorderSize = 0; //보더가 지저분해지기에 제거해줍니다.
        }

        protected override void OnPaint(PaintEventArgs p)
        {
            GraphicsPath path = new GraphicsPath();
            Rectangle rectangle = ClientRectangle;

            int radius = Math.Min(this.Height, Radius); //Height를 넘어가면 모양이 이상해집니다!

            if (IsMaximum) //최대 사이즈인 경우는 Height로!
            {
                radius = this.Height;
            }

            int x = rectangle.X;
            int y = rectangle.Y;
            int width = rectangle.Width;
            int height = rectangle.Height;

            //그리는 순서가 굉장히 중요합니다!
            path.AddArc(x, y, radius, radius, 180, 90); //왼쪽 상단
            path.AddArc(x + width - radius, y, radius, radius, 270, 90); //오른쪽 상단
            path.AddArc(x + width - radius, y + height - radius, radius, radius, 0, 90); //오른쪽 하단
            path.AddArc(x, y + height - radius, radius, radius, 90, 90); //왼쪽 하단

            path.CloseAllFigures();

            this.Region = new Region(path); //영역을 둥근형태로 만들어줍니다.

            base.OnPaint(p);
        }
    }
}
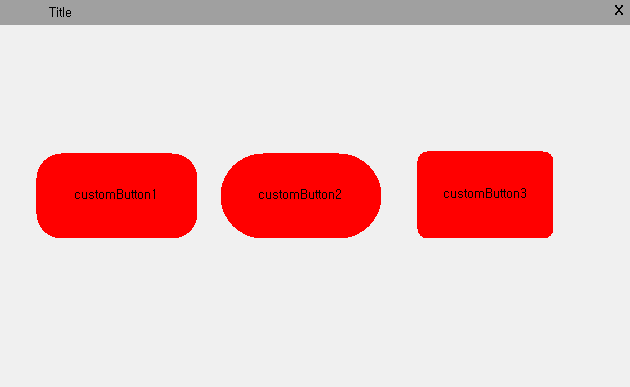
프로젝트를 "빌드" 하면 아래와 같이 구성요소에서 재정의한 버튼을 볼 수 있습니다.
해당 버튼을 알맞게 배치하고, 값을 설정하여 사용합시다!
'C# > Windows Form' 카테고리의 다른 글
| [C# Windows Form] GDI+ 이미지 돌리기 (돌아간 크기에 맞추어 이미지 크기 확장!) (cos, sin) (1) | 2024.06.03 |
|---|---|
| [C# Windows Form] Invoke, InvokeRequired - (Cross Thread) (0) | 2024.05.08 |
| [C# Windows Form] 디자인 문서개요 (요소 계층 구조 표현) (0) | 2024.03.11 |
| [C# Windows Form] 로그 클래스 (CallerMemberName) (0) | 2024.02.17 |
| [C# Windows Form] Close, Application.Exit, Environment.Exit 차이점 (0) | 2024.02.17 |