using System.Windows.Forms;

namespace WindowsFormsApp_searching
{
    public partial class Form1 : Form
    {
        public Form1()
        {
            InitializeComponent();

            label1.Text = Properties.Resources.TestString;
            pictureBox1.Image = Properties.Resources.myImage;
        }
    }
}
1. 프로젝트 오른쪽 클릭하고 속성을 눌러줍니다.
2. 리소스 탭을 클릭하면 기본 문자열에 대해 입력이 가능해집니다.
3. 문자열 외에도 여러 리소스를 등록할 수 있습니다. (이미지 등록 등은 드래그 앤 드롭해서 사용해주면 됩니다!)
URI (별칭식 경로 : Uniform Resource Identifier 통합 자원 식별자) URI는 특정 리소스를 식별하는 경로를 의미한다. 웹 기술에서 사용하는 논리적 또는 물리적 리소스를 식별하는 고유한 문자열 시퀀스다.
URL (절대 경로 : Uniform Resource Locator 또는 통칭 web address) URL은 흔히 웹 주소라고도 하며, 컴퓨터 네트워크 상에서 리소스가 어디 있는지 알려주기 위한 규약이다. URI의 서브셋이다.
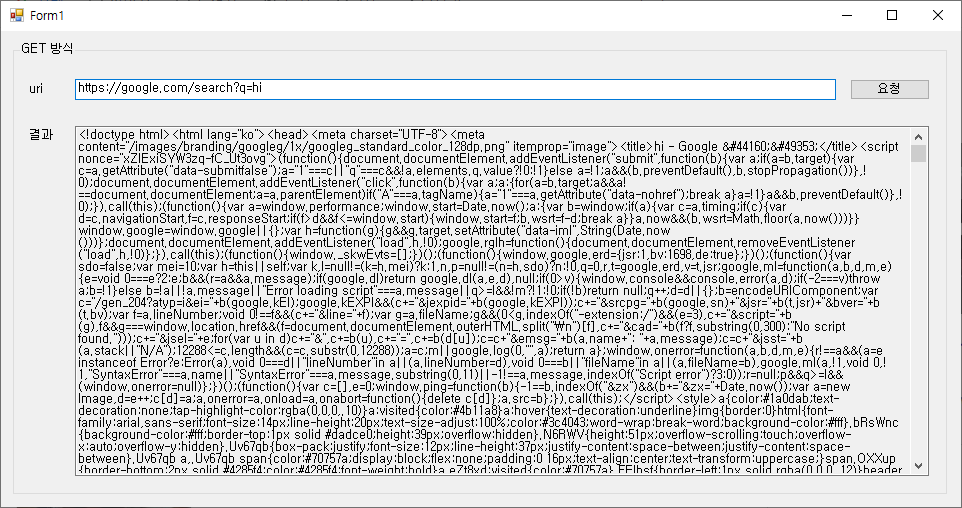
GET 방식은 헤더 부분인 주소(URI)에 변수와 값 을 통해 결과를 얻어오는 방법 입니다.
주소 뒷 쪽에 ? 변수1 = 값1 & 변수2 = 값2
식으로 변수와 값을 넘겨줄 수 있습니다. 아래는 구글에 간단하게 hi 를 GET으로 요청한 결과 입니다.
https://google.com/search 에 대해해 뒷 편에 ? q = hi 를 붙인 것이죠.
(q는 검색어 변수, hi는 값이 되겠죠)
구글에서 hi 검색한 결과
C#에서 호출 한 소스는 아래와 같습니다.
통신을 위해서 json 을 반환시키기도 하며 200(응답 성공), 400(클라이언트 에러), 500(서버쪽 에러) 를 통해
결과를 알 수도 있습니다.
.NET 에 따라 SecurityProtocol 값이 달라질 수 있습니다. (현재 .NET 4.7.2 로 작성 되었습니다.)
(ServicePointManager 첫 연결 시만 등록해주면 됩니다.)
using System;
using System.IO;  //Stream
using System.Net; //HttpWebRequest, WebRequest 등 사용
using System.Windows.Forms;

using System.Net.Security; //SSL (Secure Sockets Layer) 관련
using System.Security.Cryptography.X509Certificates; //암호화 된 인증서 관련

namespace WindowsFormsApp10
{
    public partial class Form1 : Form
    {
        public Form1()
        {
            InitializeComponent();
        }

        private void button_request_Click(object sender, EventArgs e)
        {
            //****************************** 이 부분은 첫 사용하기 전에만 넣어주면 됩니다. ***********************************
            //웹 통신 시 System.Net.WebException : 기본 연결이 닫혔습니다. 관련 에러 방지용 프로토콜 정의입니다.
            //Secure Sockets Layer, Transport Layer Secure
            ServicePointManager.SecurityProtocol = SecurityProtocolType.Tls |
                                                   SecurityProtocolType.Tls11 |
                                                   SecurityProtocolType.Tls12 |
                                                   SecurityProtocolType.Ssl3;

            //https (hyper text transfer protocol Secure : 전송 규약 보안) 보안이 올바른지 확인하는 구문입니다.
            ServicePointManager.ServerCertificateValidationCallback = new RemoteCertificateValidationCallback(ValidateServerCertificate);
            //****************************************************************************************************************

            string uri = textBox_uri.Text;
            HttpWebRequest request = (HttpWebRequest)WebRequest.Create(uri);   //요청 준비
            HttpWebResponse response = null;

            try
            {
                response = (HttpWebResponse)request.GetResponse(); //요청 후 결과 반환

                Stream stream = response.GetResponseStream();   //요청에 대한 stream 가져오기
                StreamReader reader = new StreamReader(stream); //해당 stream 읽기 위한 streamReader

                string result = reader.ReadToEnd(); //결과 읽어오기

                reader.Close();
                stream.Close();

                textBox_result.Text = result;
            }
            catch (Exception ex)
            {
                textBox_result.Text = "Request Error" + Environment.NewLine + ex.ToString();
            }
            finally
            {
                if (response != null)
                {
                    response.Close();
                }
            }
        }

        private bool ValidateServerCertificate(object sender, X509Certificate certificate, X509Chain chain, SslPolicyErrors sslPolicyErrors)
        {
            //인증서에 대한 결과를 보려면 여기서 브레이크 걸고 certificate, chain 등을 살펴보면 됩니다.
            //권장하지 않는 방법이지만 인증 기관에 대해 true로 설정해둡니다.
            return true;
        }
    }
}
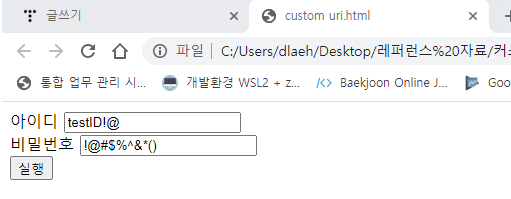
Custom URI 를 만들어 웹페이지에서 내 PC에 있는 exe 파일을 실행시키는 방법입니다.
아래와 같이 작동 됩니다.
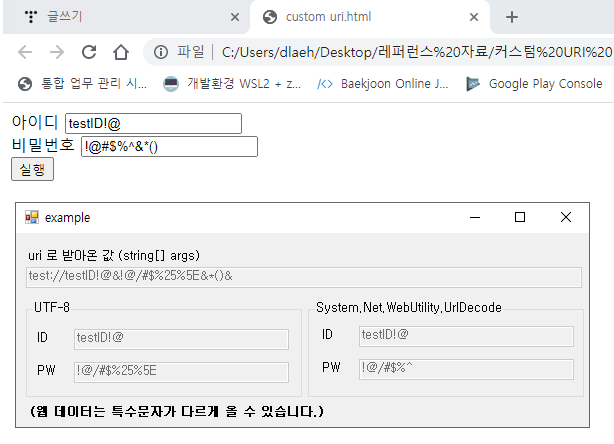
웹페이지에서 아이디 비밀번호와 같은 입력 값을 넘겨주며 .exe 파일을 실행시킵니다.실행 버튼을 누른 결과가 출력됩니다.
(주의 사항이 하나 있는데 위와 같이 변환 된 결과를 보면 웹 url에서 특수 문자가 다르게 취급됩니다.
UTF-8 과 System.Net.WebUtilty.UrlDecode 기능을 잘 섞어서 필요한 내용으로 만들어주면 되겠습니다.)
먼저 레지스트리에 해당 파일을 실행할 수 있도록 등록해주어야 합니다.
exe파일 실행 시 Main(string[] args) 부분에 대한 처리가 필요합니다.
차근차근 해봅시다.
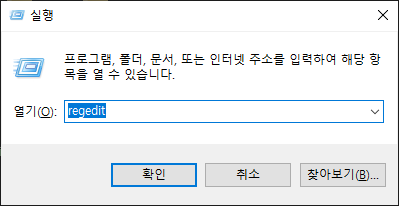
1. 윈도우키 + R을 눌러 "실행" 창을 띄워줍니다. (혹은 시작->실행 검색)
2. regedit 입력을 해줍니다.
실행 창에서 regedit 입력 후 확인
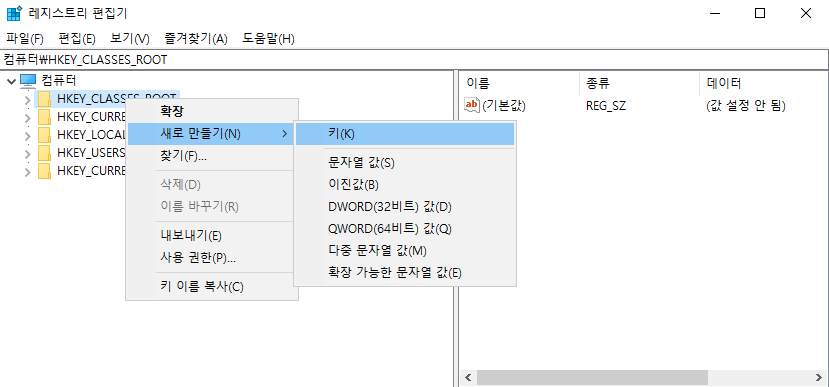
3. HKEY_CLASSES_ROOT 오른쪽 클릭 후 새로 만들기 -> 키 를 선택해줍니다.
이름은 "Test"로 설정해주겠습니다.
4. 아래와 같이 키를 생성해줍니다.
Test에서 shell, shell 에서 open, open 에서 command까지 생성해줍니다.
5. Test 에서 새로 만들기 -> 문자열 값 을 통해 새 값을 만들어줍니다.
해당 값의 이름을 URL Protocol 로 바꿔줍니다.
6. 이번엔 command 쪽의 기본 값을 수정해줍니다. (기본 값을 더블 클릭 해줍니다.)
아래와 같이 문자열 편집이 뜹니다. exe파일의 경로가 되겠습니다.
"C:\Test\test.exe" "%1"
C드라이브 테스트 폴더의 test.exe 실행을 하고, %1은 실행 시 매개변수 값을 하나 줄 수 있다는 의미입니다.
7. 비주얼 스튜디오에서 다음과 같은 코드를 작성하고 exe 파일을 생성합니다.
using System;

namespace ConsoleApp5
{
    class Program
    {
        static void Main(string[] args)
        {
            Console.WriteLine("받아 온 값");

            if (args.Length > 0)
            {
                Console.WriteLine(args[0]); //받아온 값을 보여줍니다.
            }

            Console.ReadLine(); //값을 보기 위해 대기
        }
    }
}
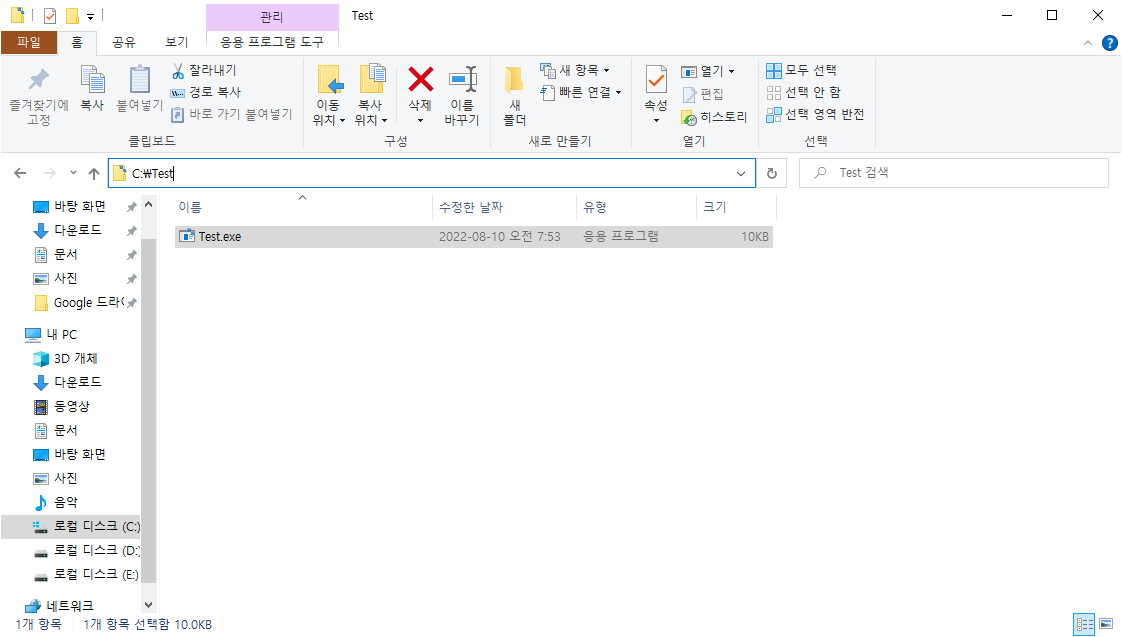
8. 해당 파일을 C:\Test\Test.exe 로 옮겨줍시다.
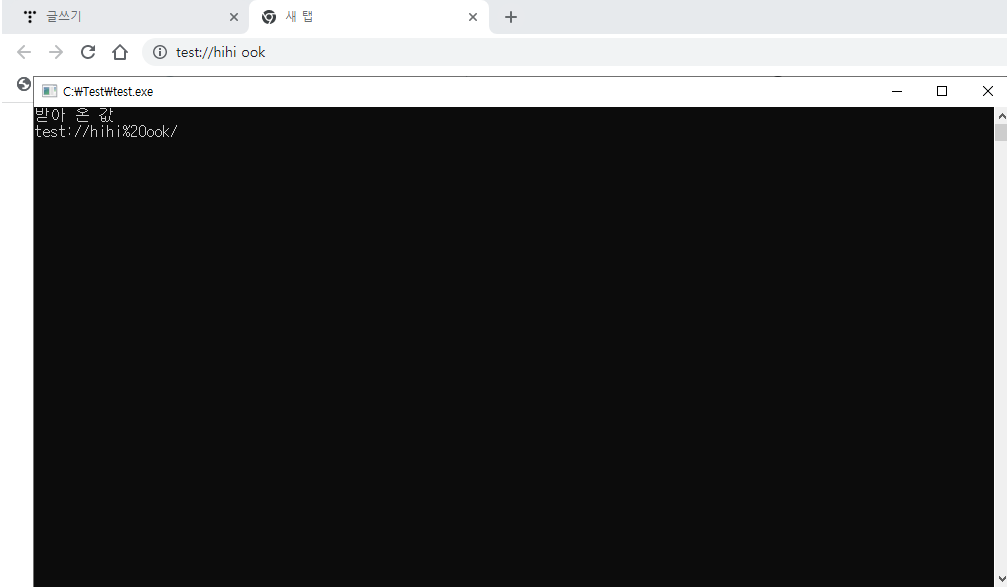
9. 웹에서 실행합니다. 간단하게 url 창에서 실행해보겠습니다.
test://hihi ook
원하는 값을 입력해줍니다. 그리고 엔터를 치면
10. 짜잔 실행이 됩니다.
저 띄어쓰기 부분은 %20 으로 나오고 맨 마지막에도 / 가 자동으로 붙게 됩니다.
우선 간단하게 값을 받아오고 실행에 성공을 하였습니다.
받아온 값을 원하는 값으로 변경해서 사용해주면 됩니다!
설명이 너무 길어져서 나머지는 예제 파일로 남겨두겠습니다.
비주일 스튜디오 2019로 작업한 파일과 레지스트리 생성, test.exe 파일이 들어있습니다.
웹에서 어떻게 호출하는지와 C#에서 값을 어떻게 받아오는지도 있으니 필요하면 확인해보시길!
<!DOCTYPE html>
<html>
 <head>
  <meta charset="utf-8">
  <script>

   function play ()
   {
    let id = document.getElementById("ID").value;
    let pw = document.getElementById("PW").value;

    let url = "Test://" + id + "&" + pw + "&"; // 레지스트리에 등록 된 Test:// 호출 부분입니다.
    //마지막에 &를 추가해줬는데 끝 부분에 / 와 같은 문자가 붙을 수 있어 경계 탐지용으로..
    let exec = document.createElement("a");
    exec.setAttribute("href", url);
    exec.click();
   }

  </script>
 </head>
 <body>
  <div> 아이디 <input id="ID" type="text" value="testID!@"></div>
  <div> 비밀번호 <input id="PW" type="text" value="!@#$%^&*()"></div>
  <div> <button id="call" onclick="play()"> 실행 </button> </div>
 </body>
</html>
WindowsForm
[Program.cs]
using System;
using System.Windows.Forms;

namespace Custom_uri_Example
{
    static class Program
    {
        [STAThread]
        static void Main(string[] args)
        {
            Application.EnableVisualStyles();
            Application.SetCompatibleTextRenderingDefault(false);

            if (args.Length > 0) //외부 호출하여 인자값이 있는 경우
            {
                Application.Run(new Form1(args));
            }
            else //바로 .exe 실행
            {
                Application.Run(new Form1());
            }
        }
    }
}
[Form1.cs]
using System.Windows.Forms;

namespace Custom_uri_Example
{
    public partial class Form1 : Form
    {
        public Form1()
        {
            InitializeComponent();
        }

        public Form1(string[] args) : this()
        {
            textBox_all.Text = args[0];

            string data = args[0].Replace("test://", ""); //앞에 불필요한 문자열은 지워줍니다.

            string[] separate = data.Split('&'); //사전에 약속 된 구분자로 나눠줍니다.

            string utf_id = separate[0];
            string utf_pw = separate[1];

            textBox_utf_id.Text = utf_id;
            textBox_utf_pw.Text = utf_pw;

            //웹에서 받아온 문자 중 특수문자가 다른 경우가 있을 때 WebUtility를 사용해줍니다.
            //System.Net 사용이 안되면 참조 추가에서 System.Net을 추가해주면 됩니다.
            string web_id = System.Net.WebUtility.UrlDecode(separate[0]);
            string web_pw = System.Net.WebUtility.UrlDecode(separate[1]);

            textBox_web_id.Text = web_id;
            textBox_web_pw.Text = web_pw;
        }
    }
}
FormBorderStyle = None 을 주고 사용자 지정 타이틀을 만들다보면 최대화 시켰을 때 맨 아래 작업 표시줄이 가려집니다.
(왼쪽이 평상시 상태, 오른쪽은 가려진 형태)
이에따라 현재 스크린에 따른 최대화 사이즈 지정이 필요합니다.
using System;
using System.Drawing;
using System.Windows.Forms;

namespace WindowsFormsApp1
{
    public partial class Form1 : Form
    {
        public Form1()
        {
            InitializeComponent();
        }

        private void button1_Click(object sender, EventArgs e)
        {
            if (this.WindowState == FormWindowState.Normal)
            {
                Size size = new Size();

                //현재 폼이 가장 가까운 모니터에 대한 작업 영역 크기를 가져옵니다.
                size.Width = Screen.FromControl(this).WorkingArea.Width;
                size.Height = Screen.FromControl(this).WorkingArea.Height;

                this.MaximumSize = size;
                this.WindowState = FormWindowState.Maximized;
            }
            else
            {
                this.WindowState = FormWindowState.Normal;
            }
        }
    }
}
using System;
using System.Drawing;
using System.Windows.Forms;

namespace WindowsFormsApp6
{
    public partial class Form1 : Form
    {
        private Point prePosition;

        public Form1()
        {
            InitializeComponent();
        }

        private void button_close_Click(object sender, EventArgs e)
        {
            Close();
        }

        private void button_sizeChange_Click(object sender, EventArgs e)
        {
            if (this.WindowState == FormWindowState.Normal)
            {
                SetMaximize();
            }
            else
            {
                SetNormal();
            }
        }

        private void SetNormal ()
        {
            this.Location = prePosition; //크기 변경 시 원 위치로 복귀
            this.WindowState = FormWindowState.Normal;
        }

        private void SetMaximize ()
        {
            Screen[] screens = Screen.AllScreens;
            int length = screens.Length;
            int area;

            for (area = 0; area < length; ++area) //모든 모니터 영역 확인
            {
                if (screens[area].WorkingArea.Contains(this.Location))
                {
                    break;
                }
            }

            //화면 밖인 경우 첫번째 모니터로 해줍니다.
            if (length <= area)
            {
                area = 0;
            }

            prePosition = this.Location; //노멀화 시킬 때 이동시킬 좌표값.

            //화면 기준점으로 이동 후 최대화 시켜주어야 정상적인 결과를 얻습니다.
            this.Location = new Point(screens[area].Bounds.X, screens[area].Bounds.Y);

            this.MaximizedBounds = new Rectangle(MaximizedBounds.X,
                                                 MaximizedBounds.Y,
                                                 screens[area].WorkingArea.Width,  //width 와 height를 바꿔줍니다.
                                                 screens[area].WorkingArea.Height);

            this.WindowState = FormWindowState.Maximized; //최대화
        }
    }
}