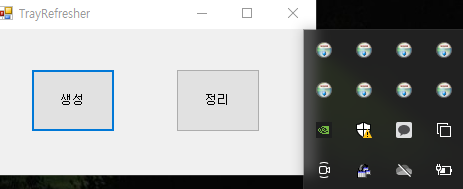
Alt + Tab 시 Form이 화면에 노출 됩니다.


아래 소스를 통해 탭에서 해당 폼을 볼 수 없도록 만들 수 있습니다.

Form3이 있지만 테스크 변경에서 보이지 않게 됩니다.

using System.Windows.Forms;

namespace DrawString
{
    public partial class Form3 : Form
    {
        public Form3()
        {
            InitializeComponent();

            this.ShowInTaskbar = false;
            this.FormBorderStyle = FormBorderStyle.FixedToolWindow;
        }

        //this.FormBorderStyle = FormBorderStyle.FixedToolWindow; 와 동일한 동작을 합니다.
        //protected override CreateParams CreateParams
        //{
        //    get
        //    {
        //        CreateParams cp = base.CreateParams;
        //        cp.ExStyle |= 0x80;
        //        return cp;
        //    }
        //}
    }
}

    //아래 두형태에 대해서는 Alt+Tab에서 보이지 않게 되는군요!
    public enum FormBorderStyle
    {
        ...
        // 요약:
        //     크기를 조정할 수 없는 도구 창 테두리입니다. 사용자가 ALT + TAB을 누를 때 표시 되는 창 또는 작업 표시줄에는 도구 창이 나타나지
        //     않습니다. 지정 하는 폼 있지만 System.Windows.Forms.FormBorderStyle.FixedToolWindow 일반적으로에
        //     표시 되지 않은 작업 표시줄을 확인 해야는 System.Windows.Forms.Form.ShowInTaskbar 속성이 false, 기본값
        //     이므로, true합니다.
        FixedToolWindow = 5,
        //
        // 요약:
        //     크기 조정 가능한 도구 창 테두리입니다. 사용자가 ALT + TAB을 누를 때 표시 되는 창 또는 작업 표시줄에는 도구 창이 나타나지 않습니다.
        SizableToolWindow = 6
    }


이미지 등 컨트롤 위에 투명한 Form이 위치한 모습!


Winform에는 Z인덱스가 없더군요. 약간의 트릭을 써서 위와같은 형태를 만들 수 있었습니다.

(화면만 가려질 뿐 뒷쪽과 상호작용 가능합니다)


간단한 구조를 먼저 보자면..


1. 새로운 Form을 만들어 줍니다.

2. 새로운 Form에 WndProc 를 수정하여 통해 뒷쪽 컨트롤에게 이벤트를 넘겨줄 수 있도록 수정합니다.

3. OnPaint를 통해 문자를 그려줍니다.

4. Form의 소유자를 지정하여 소유자 상단에 위치하도록 해줍니다.


아래는 2개의 폼에 대한 코드입니다.


[Form1.cs]

using System;
using System.Drawing;
using System.Windows.Forms;

namespace DrawString
{
    public partial class Form1 : Form
    {
        private Form2 form2 = new Form2();

        public Form1()
        {
            InitializeComponent();
        }

        private void Form1_Load(object sender, EventArgs e)
        {
            form2.Show();
            form2.Owner = this; //[4번] form1가 form2를 소유하여 상단에 위치시킵니다. (매우 중요)

            pictureBox1.Image = Image.FromFile(@"C:\Users\dlaeh\Desktop\test.tif");
            pictureBox1.SizeMode = PictureBoxSizeMode.Zoom;
            ShowTransparentForm();
        }

        private void ShowTransparentForm ()
        {
            int offsetY = 30;
        
            //크기에 맞춰 수정 가능합니다!
            form2.Size = new Size(this.Width - 16, pictureBox1.Size.Height);
            form2.Location = new Point(this.Location.X + 8,
                                       this.Location.Y + pictureBox1.Location.Y + offsetY);
        }

        private void Form1_Resize(object sender, EventArgs e) //크기 변경 시 맞춰서 변경
        {
            ShowTransparentForm();
            form2.Refresh(); //Form을 수동으로 늘리면 텍스트가 짤리더군요!
        }

        private void Form1_Move(object sender, EventArgs e) //이동 시에 위치 변경
        {
            ShowTransparentForm();
        }
    }
}


[Form2.cs]

using System;
using System.Drawing;
using System.Windows.Forms;

namespace DrawString
{
    public partial class Form2 : Form
    {
        private const int WM_NCHITTEST = 0x84; //마우스 커서 위치 메시지
        private const int HTTRANSPARENT = -1; //뒷쪽의 컨트롤에 메시지를 넘깁니다.

        public Form2()
        {
            InitializeComponent();

            this.Enabled = false; //상호작용 안하기 위해
            this.FormBorderStyle = FormBorderStyle.None; //기본폼으로
            this.Opacity = 0.5; //투명도
            this.ShowInTaskbar = false; //Alt + Tab 등 선택 방지

            //for test
            this.BackColor = Color.Black;
        }

        //[2번]
        //WM_NCHITTEST 와 HTTRANSPARENT 관련 공식사이트
        //https://learn.microsoft.com/ko-kr/windows/win32/inputdev/wm-nchittest
        protected override void WndProc(ref Message message)
        {
            if (message.Msg == WM_NCHITTEST) //마우스 커서 위치 메시지
            {
                message.Result = (IntPtr)HTTRANSPARENT; // 뒷쪽의 컨트롤에 메시지를 넘깁니다.
            }
            else
            {
                base.WndProc(ref message);
            }
        }


        private int offsetX = 200;
        private int offsetY = 300;
        private int rotateOffsetY = 30;
        private int rotate = 30;

        protected override void OnPaint(PaintEventArgs e) //[3번] 그려주기!
        {
            Graphics graphics = e.Graphics;

            SolidBrush myBrush = new SolidBrush(Color.FromArgb(50, 255, 50, 50));

            for (int i = 0; i * offsetY + rotateOffsetY <= this.Size.Height; ++i)
            {
                graphics.TranslateTransform(0, i * offsetY + rotateOffsetY);

                for (int j = 0; j * offsetX <= this.Size.Width; ++j)
                {
                    graphics.TranslateTransform(offsetX, 0);
                    graphics.RotateTransform(-rotate);
                    graphics.DrawString("2024-02-11 !@#@##@ test~~", new Font(FontFamily.GenericSansSerif, 15, FontStyle.Bold), myBrush, Point.Empty);
                    graphics.RotateTransform(rotate);
                }
                
                graphics.ResetTransform();
            }

            graphics.ResetTransform();
            base.OnPaint(e);
        }
    }
}


도구 -> 옵션 -> 환경 -> 클라이언트 성능에 따른 시각적 효과 자동 조정 항목 체크를 해주면 됩니다.


파일 저장, 불러오기 등에 사용되는 옵션이 있습니다.


양식은

(2개 이상 받기)

설명문|파일확장자;파일확장자2


(1개씩 받기)

파일명1 | 파일1확장자 | 파일2 | 파일2확장자

형태로 입력하면 됩니다.


using System.Windows.Forms;

namespace WindowsFormsApp_searching
{
    public partial class Form1 : Form
    {
        public Form1()
        {
            InitializeComponent();
        }

        private void button1_Click(object sender, System.EventArgs e)
        {
            OpenFileDialog openFileDialog = new OpenFileDialog();

            openFileDialog.Filter = "Tif(Tiff),JPG|*.tif;*.jpg|ALL|*.*";

            if (openFileDialog.ShowDialog() == DialogResult.OK)
            {
                //선택 된 경우!
            }
        }
    }
}

프로젝트에 리소스를 등록하여 사용하는 방법을 알아보겠습니다.

Properties.Resources.  을 이용하여 접근 가능합니다.


먼저 완성된 코드와 그림입니다.

using System.Windows.Forms;

namespace WindowsFormsApp_searching
{
    public partial class Form1 : Form
    {
        public Form1()
        {
            InitializeComponent();

            label1.Text = Properties.Resources.TestString;
            pictureBox1.Image = Properties.Resources.myImage;
        }
    }
}


1. 프로젝트 오른쪽 클릭하고 속성을 눌러줍니다.


2. 리소스 탭을 클릭하면 기본 문자열에 대해 입력이 가능해집니다.


3. 문자열 외에도 여러 리소스를 등록할 수 있습니다. (이미지 등록 등은 드래그 앤 드롭해서 사용해주면 됩니다!)

Process.Start 혹은 Process 클래스를 구현하여 사용하여 프로그램 실행이 가능합니다.

아래는 엑셀, 텍스트 문서를 열은 예제입니다.

using System;
using System.Diagnostics;
using System.IO;

namespace ConsoleApp
{    
    class Program
    {
        public static void Main(string[] args)
        { 
            Process process = new Process();

            /* 프로그램 실행 시키고 기다리기.
            Process pro = Process.Start("...");
            pro.WaitForExit();
            */

            Console.WriteLine("[Excel] 프로세스 시작!");

            process.StartInfo.Arguments = Path.Combine(Directory.GetCurrentDirectory(), "test.xlsx");
            process.StartInfo.FileName = "excel.exe";
            process.StartInfo.UseShellExecute = true; //엑셀 실행 시 UseShellExecute 필요!

            process.Start();
            process.WaitForExit();

            //위와 동일한 작업을 합니다!
            //Process pro = Process.Start(new ProcessStartInfo("excel.exe", Path.Combine(Directory.GetCurrentDirectory(), "test.xlsx")) { UseShellExecute = true });
            //pro.WaitForExit();

            Console.WriteLine("[Excel] 프로세스 종료!");

            Console.WriteLine("[notepad] 프로세스 시작!");

            process.StartInfo.Arguments = Path.Combine(Directory.GetCurrentDirectory(), "test.txt");
            process.StartInfo.FileName = "notepad.exe";

            process.Start();
            process.WaitForExit();

            Console.WriteLine("[notepad] 프로세스 종료!");
        }
    }
}


결과! (해당 경로에 파일이 있어야 열립니다)


FormBorderStyle = None 인 폼은 기본적으로 크기 조절 및 이동이 불가능합니다.

해결해야 할 것은 3가지 입니다.


1. 마우스가 테두리에 위치하여 크기를 변경 가능

2. 마우스 이동에 따른 이벤트 추가 (혹은 WndProc에서 제어도 가능!)

3. 최대화 시 작업표시줄을 가리지 않게 수정 (타이틀이 없기에 크기가 더 커집니다.)


using System;
using System.Collections.Generic;
using System.Drawing;
using System.Windows.Forms;

namespace MoveableForm
{
    public partial class Form1 : Form
    {
        private int titleHeight = 32;
        private int padding = 5;

        private int offsetX;
        private int offsetY;
        private bool isMoving;

        //테스트용 출력 값
        private Dictionary<int, string> positionDict = new Dictionary<int, string>()
        {
            {0, "pass" },
            //{1, "clientInner" },
            //{2, "moveable and changeSize" },
            {10, "left" },
            {11, "right" },
            {12, "top" },
            {15, "bottom" },
            {13, "topLeft" },
            {14, "topRight" },
            {16, "bottomLeft" },
            {17, "bottomRight" }
        };

        public Form1()
        {
            InitializeComponent();
        }

        private IntPtr GetMousePosition (Point point)
        {
            int x = point.X;
            int y = point.Y;

            int width = this.ClientRectangle.Width;
            int height = this.ClientRectangle.Height;

            bool innerWidth = padding <= x && x < width - padding;
            bool innerHeight = padding <= y && y < height - padding;

            bool isTop = y <= padding / 2; //타이틀쪽 살짝 보정
            bool isBottom = height - padding <= y;
            bool isLeft = x <= padding;
            bool isRight = width - padding <= x;

            if (isLeft && innerHeight)  return (IntPtr)10; //left
            if (isRight && innerHeight) return (IntPtr)11; //right
            if (isTop && innerWidth)    return (IntPtr)12; //top
            if (isBottom && innerWidth) return (IntPtr)15; //bottom

            if (isTop && isLeft)        return (IntPtr)13; //topLeft
            if (isTop && isRight)       return (IntPtr)14; //topRight
            if (isBottom && isLeft)     return (IntPtr)16; //bottomLeft
            if (isBottom && isRight)    return (IntPtr)17; //bottomRight

            //1 : 클라이언트 내부인 경우.
            //2 : 윈도우창 움직이거나 더블클릭이 가능.
            //return y <= titleHeight ? (IntPtr)2 : (IntPtr)1;

            return (IntPtr)0;
        }

        protected override void WndProc(ref Message m)
        {
            //https://learn.microsoft.com/ko-kr/windows/win32/inputdev/wm-nchittest
            //WM_NCHITTEST = 0x84
            if (m.Msg == 0x84)
            {
                Point point = new Point(m.LParam.ToInt32());
                point = PointToClient(point);
                
                m.Result = GetMousePosition(point);
                label3.Text = positionDict[(int)m.Result]; //테스트용 값입니다.
                return;
            }

            base.WndProc(ref m);
        }

        private void label1_Click(object sender, EventArgs e)
        {
            Close();
        }

        private void panel_title_MouseDown(object sender, MouseEventArgs e)
        {
            if (this.WindowState == FormWindowState.Maximized)
            {
                return;
            }

            offsetX = Cursor.Position.X - Location.X;
            offsetY = Cursor.Position.Y - Location.Y;

            isMoving = true;
        }

        private void panel_title_MouseMove(object sender, MouseEventArgs e)
        {
            if (isMoving)
            {
                Location = new Point(Cursor.Position.X - offsetX, Cursor.Position.Y - offsetY);
            }
        }

        private void panel_title_MouseUp(object sender, MouseEventArgs e)
        {
            isMoving = false;
        }

        private void panel_title_MouseDoubleClick(object sender, MouseEventArgs e)
        {
            if (this.WindowState == FormWindowState.Normal)
            {
                //화면 최대화 시 하단의 작업표시줄을 덮지 않도록 해줍니다.
                this.MaximumSize = new Size(Screen.FromControl(this).WorkingArea.Width,
                                            Screen.FromControl(this).WorkingArea.Height);

                this.WindowState = FormWindowState.Maximized;
            }
            else
            {
                this.WindowState = FormWindowState.Normal;
            }
        }
    }
}


클래스, 구조체 등 내부 값이 있는 경우에 IComparer<T> 를 이용하여 비교하여 정렬이 가능합니다.


using System;
using System.Collections.Generic;

namespace ConsoleApp
{    
    class Program
    {
        class DescCompare : IComparer<Data>
        {
            //작으면 -1, 같으면 0, 크면 1
            //반대인 경우는 Asc 가능
            public int Compare(Data data1, Data data2)
            {
                return data1.A < data2.A ? -1 : 1;
            }
        }

        class Data
        {
            public int A { get; set; }
            public string B { get; set; }
        }

        static void PrintList (List<Data> datas, string message)
        {
            Console.WriteLine(message);
            foreach (Data data in datas)
            {
                Console.WriteLine(string.Format("{0}) {1}", data.A, data.B));
            }
        }

        public static void Main(string[] args)
        {
            List<Data> datas = new List<Data>();
            datas.Add(new Data { A = 30, B = "Test30" });
            datas.Add(new Data { A = 20, B = "Test20" });
            datas.Add(new Data { A = 10, B = "Test10" });

            PrintList(datas, "정렬 전");
            datas.Sort(new DescCompare());
            PrintList(datas, "정렬 후");
        }
    }
}


+ Recent posts